Faculty Help Sheets

| Blackboard Support: Faculty Help Sheets | |
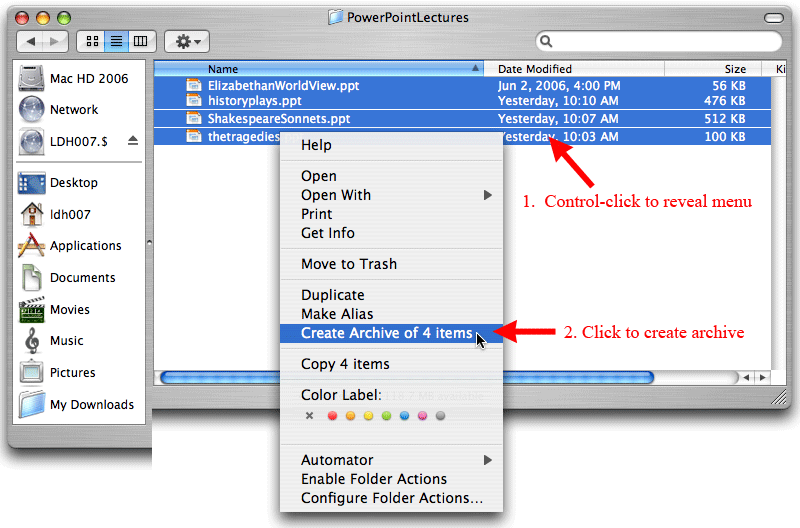
Adding Multiple Documents at a Time Using the Document UnpackagerUsually, it is better to upload documents into your Blackboard course one file at a time, since Blackboard allows you to provide descriptive information about each document and to set the options so that you can see (for example) whether students are actually viewing a particular document in your course. When you have a group of similar files to upload, however, it can be tedious to do that one file at a time. To make possible "bulk" uploads of files into a Blackboard course, we have installed a "building block" (that is, a program to extend Blackboard's functionality) called the Document Unpackager. The Document Unpackager allows you to upload a compressed (*.ZIP) archive file into your course. That ZIP archive can contain documents and even folders that themselves contain document. The building block will unzip the archive, create folders in Blackboard, and create an item for each of the documents as well. The title for each document will be the same as the file name, and the link to each document will also be the file name, with the appropriate file extension (as in mydocument.doc). The process involves two steps, which we will explain in two separate help sheets: Creating the Zip Archive (Macintosh Version)Please note that these instructions are for a Macintosh under OS X. If you are using a Windows computer, you can follow these instructions instead.
Last revised February 26, 2008. Please send questions or comments to itec@bucknell.edu. |
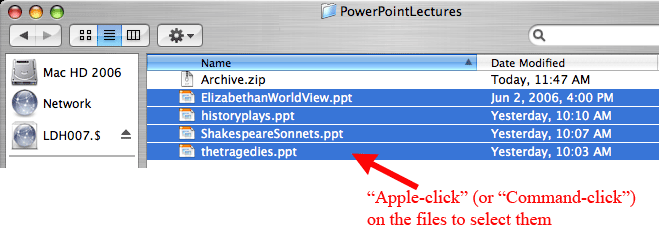
 ), also known as the "Command key" (
 ), click on each document that you want to include in the package: