
Creating "Smart Views" Based on Groups
Most likely, you have come to this page from
Creating Groups for Individual Sections (opens in new window or tab). You'll need to create groups first before you can create a "Smart View" based on those groups, allowing you to enter grades and to view grades for each individual section in your merged or cross-listed course. (In other words, if you haven't followed those instructions first, you'll need to open that page and create the groups first, before proceeding with these instructions.)
To create a Smart View for each section group:
- Log in to Blackboard
(opens in new window), and click on your course among the list of "Courses you are teaching" in the My Courses
section of the opening page. Within that course, go to the Control Panel by clicking on the
 icon near the bottom of the left-hand navigation menu. icon near the bottom of the left-hand navigation menu.
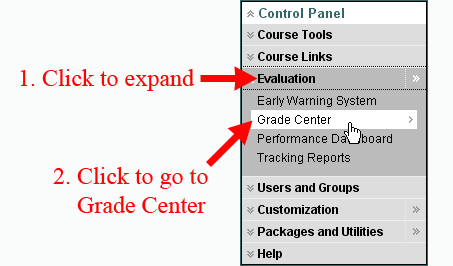
- Click on the Grade Center link in the Assessment area of the Control Panel, in the right-middle section of the page:
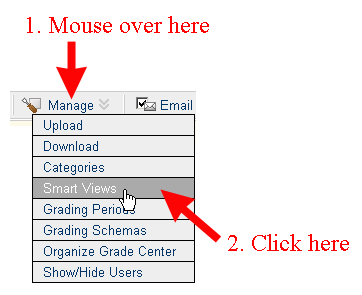
- Within the Grade Center, move your mouse over the Manage button in the series of buttons above the grade spreadsheet, so that a contextual menu appears. Within that menu, click on Smart Views:
- You'll be taken to the Smart Views page. Click on the
 button just under the page title. button just under the page title.
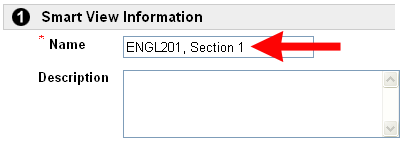
- Since this "Smart View" will consist of only the students in one of the sections of your course, you'll basically want to use the same name that you entered for the group, indicating what section it is. You won't really need a description, so you can leave that field blank:
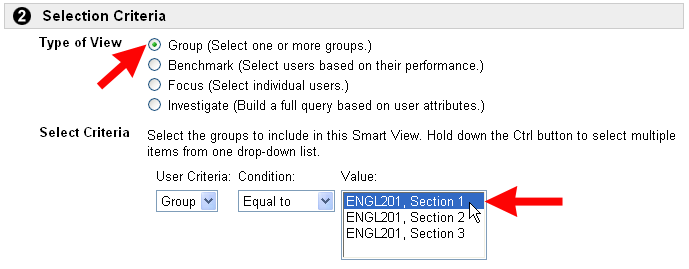
- By default, "Group" will be selected as the type of view, so you can click on the group that corresponds to the Smart View that you are creating:
- Since you'll most likely want to display all Grade Center columns in that Smart View, you can just scroll down to the bottom of the page (if necessary), and click on the
 button to send your selections to the server. button to send your selections to the server.
- You'll return to the Smart Views page, and your first "Smart View" will be displayed on that page, listed in the "Title" column. Repeat Steps 4 through 7 above to add a "Smart View" for the other sections of your course.
- When you are done creating the Smart Views, click on the
 button to return to the Grade Center for your course. button to return to the Grade Center for your course.
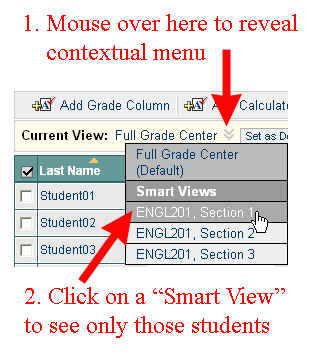
- To see the students from only one section (in other words, to display one of the "Smart Views" that you just created, click on the double down arrow next to Current View to reveal a contextual menu, and then click on the section whose students you want to see:
Even if you add grades only to the Smart View display, the grades are still part of the full Grade Center, and you will see them from the full view as well, when you return to that view.
Last revised
September 25, 2008
. Please send questions or comments to itec@bucknell.edu.
|


