Managing Grade Center Categories in Blackboard
If you are
weighting grades by category (instructions open in new window) in Blackboard, then it's possible that you'll need to create a new category for particular items in your Gradebook. For example, if you assign essays of different lengths that will have different weighted values, you may need to create categories called "Short Essay" and "Long Essay". If your students need to do a group collaborative project, you might need to create a "Group Project" category as well, since that too isn't one of Blackboard's default categories. To create new Grade Center categories in Blackboard:
- Log in to Blackboard
(opens in new window), and click on your course among the list of "Courses you are teaching" in the My Courses
section of the opening page. Within that course, go to the Control Panel by clicking on the
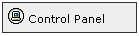 icon near the bottom of the left-hand navigation menu. icon near the bottom of the left-hand navigation menu.
- In the "Assessment" area of the Control Panel, on the right-hand side of the page, click on the Grade Center link:

- You will see a Grade Center page, with the list of students in your course occupying the first two columns, and with Total and Weighted Total representing two additional columns, along with columns for whatever other items you have (or Blackboard has) added to your Grade Center.
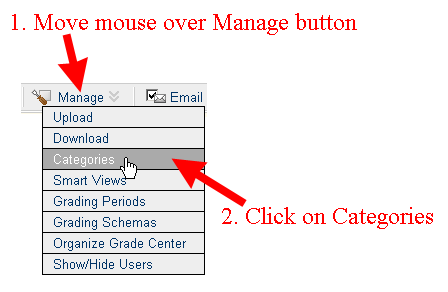
To create a new Grade Center category (or categories), move your mouse over the Manage button just above the spreadsheet display, and click on the Categories link:
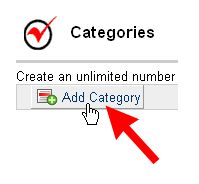
- On the resulting Categories page, you will see a list of categories that we have created as part of our default course template. To add a new category to the Grade Center, click on the Add Category button just above the list of categories:
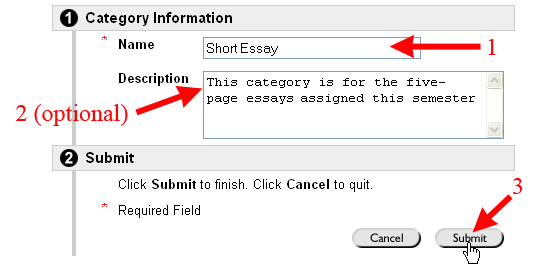
- Type in a name for the new category. As a reminder to yourself, you can also type in a description, although the description field is optional. When you are done entering the information, click on the Submit button to send your changes to the server:
- Blackboard will reload the Categories page with a "SUCCESS" message at the top, indicating that "The category has been successfully added." If you need to create another category, you can follow Steps 5 and 6 above to create that additional category (or categories).
When you are done creating the additional category (or categories), click on the  button to return to the Grade Center for your course. button to return to the Grade Center for your course.
- Assuming that you have added items to your Grade Center before creating these custom categories, it's possible that you'll need to assign an item to a different category, following these instructions.
Last revised
October 24, 2008
. Please send questions or comments to itec@bucknell.edu.
|