Adding a Banner Image to a Blackboard Course
Advice books on excellent college teaching sometimes talk about the importance of the first day of class, as a way to invite students to participate fully in the learning that will take place. You can think of the entry page of your Blackboard course as a similar opportunity to welcome students to the course. By uploading an arresting or thematically appropriate banner image, you can capture students' attention, at least for the first few times they visit your course. Here, for example, is a banner image used to welcome students to an Introduction to Acting course, inviting students to "get their hands dirty" by involving themselves physically and intellectually in the course material:

The instructions below describes how to add a banner image to the entry page of your Blackboard course, for similar arresting effects:
- We'll assume for this help sheet that you have already found the image you want to use and that you have the right to use that image in your course (based on "fair use" or other copyright guidelines). We'll assume as well that you have downloaded the image to your hard drive, and you are ready to upload it as a banner image for the opening page of your Blackboard course. You can access your course by logging in to
myBucknell (opens in new window) and by clicking on the relevant course listing in the My Blackboard "gadget" on that page or by logging in directly to
Blackboard
(opens in new window).
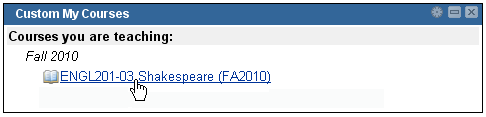
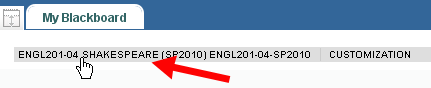
- If you are on the main My Blackboard page in Blackboard, you can access your course by finding it in the Custom My Courses module in the middle column on that page and then clicking on the link for the course:
- You'll first need to make sure that the Edit Mode switch at the top-right corner of the page is in the On position, which it should be by default. If the Edit Mode switch is in the "Off" position, you need to click on it to turn editing mode on:

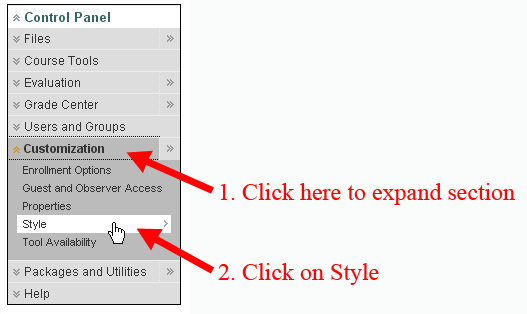
- In the new Bb 9 Control Panel, click on Customization to expand that section, and then click on "Style"
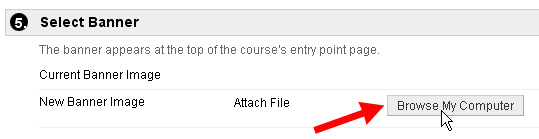
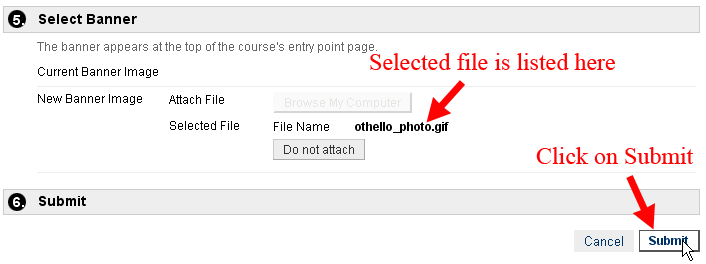
- On the Style page, scroll down to Section 5, Select Banner, and click on the "Browse My Computer" button:
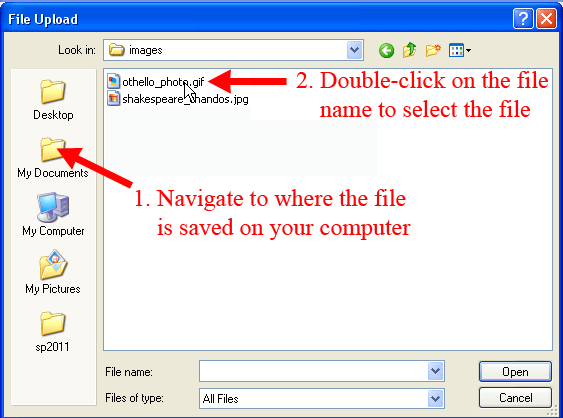
- Navigate to where the image file is saved on your hard drive, and double-click on the file name to select the particular file you want to upload:
- The file name will appear in that Select Banner section. Click on the Submit button to upload your file to the server as a banner image for your course:
- At the top of the page, in the green status bar, Blackboard will indicate that the Course Style was successfully updated. You can use the "bread-crumb trail" at the top of the page to return to the opening page for your course:
You should now see the banner image displayed at the top of the course page.
Last revised March 11, 2011. Please send questions or comments to
itec@bucknell.edu.
|