Making a Course Available to Students
As part of our "Snapshot" process, we create blank Blackboard course shells for all courses
being offered during a semester, based on the course listings in Banner. Those courses are initially created as "unavailable"; in
other words, a student won't actually be able to get to a course in Blackboard unless the faculty member changes
a particular setting to make that course available to students. To activate your Blackboard course for the semester (that is, to make it
available to students):
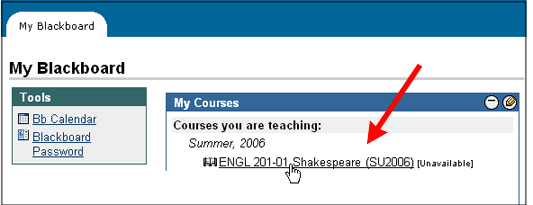
- Log in to Blackboard
(opens in new window), and click on your course among the list of "Courses you are teaching" in the My Courses
section of the opening page. The course link should be black in color, and you should see "[Unavailable]" at
the end of the course name:
- Within that course, go to the Control Panel by clicking on the
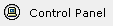 icon near the bottom of the left-hand navigation menu. icon near the bottom of the left-hand navigation menu.
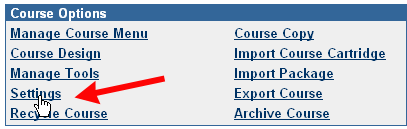
- Within the Course Options section of the Control Panel (in the bottom-left quadrant of your browser window), click on the
Settings link:
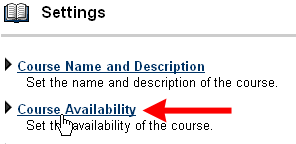
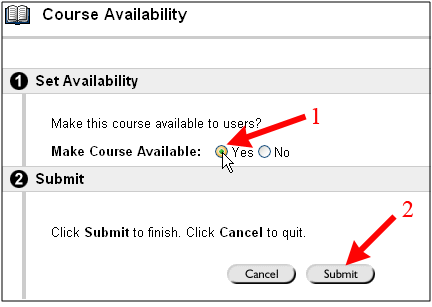
- Among the links on that "Settings" page, click on the Course Availability link (the second from the top):
- Click on the radio button next to "Yes" (for Make Course Available), and click on the Submit
button to send your changes to the server:
- Blackboard will respond that the settings for your course "have been updated." Click on the
 button two successive times to return to the
Control Panel for your course. button two successive times to return to the
Control Panel for your course.
Note: For an animated tutorial showing you how to execute these steps, see
http://www.departments.bucknell.edu/isr/TeachingAndTechnology/Blackboard/Help/Tutorials/MakeAvailable/.
Last revised
January 17, 2008
. Please send questions or comments to itec@bucknell.edu.
|